In this part of the tutorial, we will create the Provisioning CT server that will manage the deployment of the GOAD lab using Ansible.
The other articles are available here:
Create the Provisioning CT
Go to your local storage on your Proxmox
- Go to Templates
- Search for Ubuntu and select the most recent version
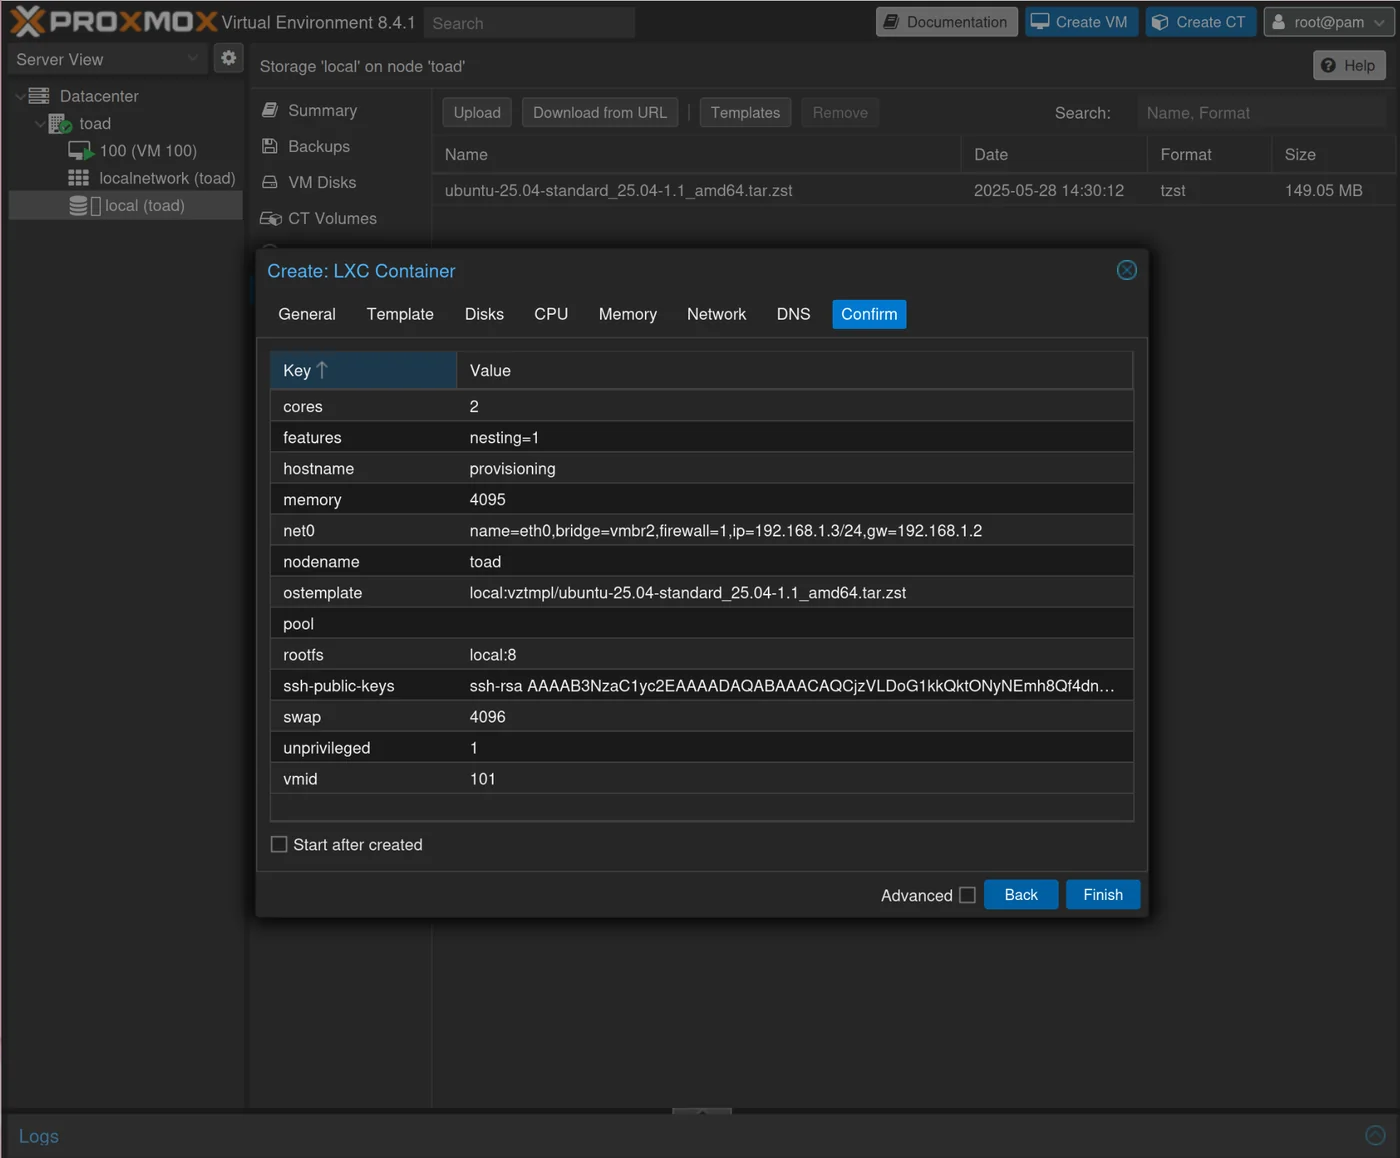
Once you have Ubuntu, you will set your own password here with the hostname: provisioning
- Paste your ssh public key that you will use to connect to the provisioning CT (the same one given in ~/.ssh/config).
- Set the Template as the ubuntu we downloaded
- Set 4096 for memory
- Bridge = vmbr2
You should get this, and then you can click Finish
Download GOAD
On your provisioning ct, download GOAD from its github by running:
apt install python3-venv
cd /root
git clone https://github.com/Orange-Cyberdefense/GOAD.git
cd GOAD
./goad.sh
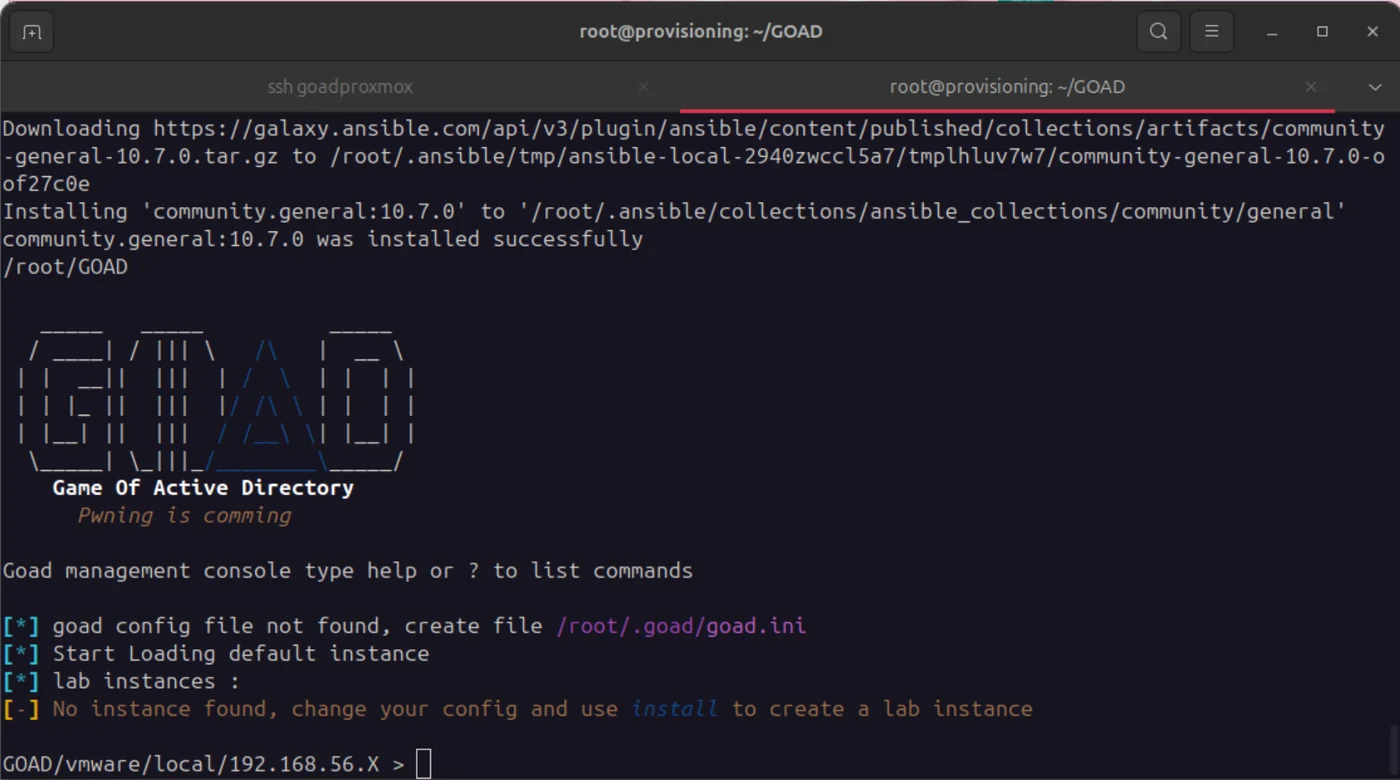
If everything went well, you should see the GOAD interface here which you can exit by typing exit
Run the configuration for Proxmox:
cd /root/GOAD
bash -f ./scripts/setup_proxmox.sh
This may work directly for you and you can ignore the following, however I encountered several errors because the container had Python 3.13 by default with which Ansible currently has compatibility issues.
I used Pyenv to manage python versions: https://github.com/pyenv/pyenv.
I installed Python 3.10.13 instead.
Make sure that if the .venv file has already been created, to delete it to recreate it with a different version of python.
curl <https://pyenv.run> | bash
echo 'export PYENV_ROOT="$HOME/.pyenv"' >> ~/.bashrc
echo '[[ -d $PYENV_ROOT/bin ]] && export PATH="$PYENV_ROOT/bin:$PATH"' >> ~/.bashrc
echo 'eval "$(pyenv init - bash)"' >> ~/.bashrc
source ~/.bashrc
apt install libssl-dev
pyenv install 3.10.13
Get Your Files
Download the Windows ISO
In Local → ISO Images → download from URL, download the two windows iso images by url:
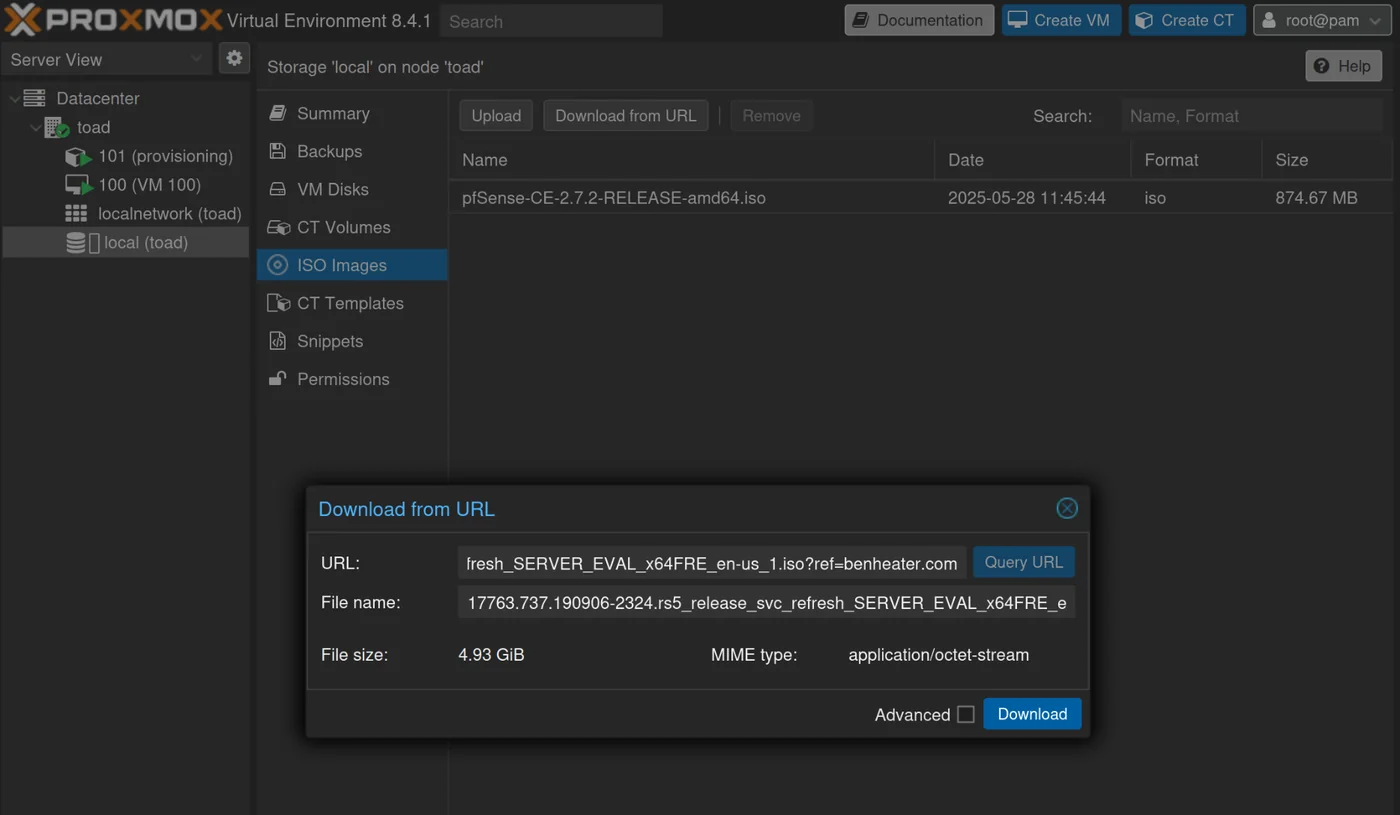
Give them the following names (windows_server_2019_17763.737_eval_x64.iso and windows_server_2016_14393.0_eval_x64.iso) or make sure to modify the iso_file variables in /root/GOAD/packer/proxmox/windows_server2019_proxmox_cloudinit.pkvars.hcl and /root/GOAD/packer/proxmox/windows_server2016_proxmox_cloudinit.pkvars.hcl
Windows 2019
Windows 2016
Download cloudbase on goadprovisioning
Packer needs ${path.root}/scripts/sysprep/cloudbase-init.ps1, and ${path.root}/scripts/sysprep/cloudbase-init-p2.ps1
cd /root/GOAD/packer/proxmox/scripts/sysprep/
wget https://cloudbase.it/downloads/CloudbaseInitSetup_Stable_x64.msi
Download virtio-win.iso on goadproxmox
ssh goadproxmox
cd /var/lib/vz/template/iso
wget https://fedorapeople.org/groups/virt/virtio-win/direct-downloads/stable-virtio/virtio-win.iso
Provisioning User
Create the user for provisioning: infra_as_code@pve
On the proxmox ssh:
pveum useradd infra_as_code@pve
pveum passwd infra_as_code@pve

pveum roleadd Packer -privs "VM.Config.Disk VM.Config.CPU VM.Config.Memory Datastore.AllocateTemplate Datastore.Audit Datastore.AllocateSpace Sys.Modify VM.Config.Options VM.Allocate VM.Audit VM.Console VM.Config.CDROM VM.Config.Cloudinit VM.Config.Network VM.PowerMgmt VM.Config.HWType VM.Monitor SDN.Use"

pveum acl modify / -user 'infra_as_code@pve' -role Packer
pveum acl modify / -user 'infra_as_code@pve' -role Administrator
Modify the Variables:
cd /root/GOAD/packer/proxmox/
cp config.auto.pkvars.hcl.template config.auto.pkrvars.hcl
vim config.auto.pkvars.hcl
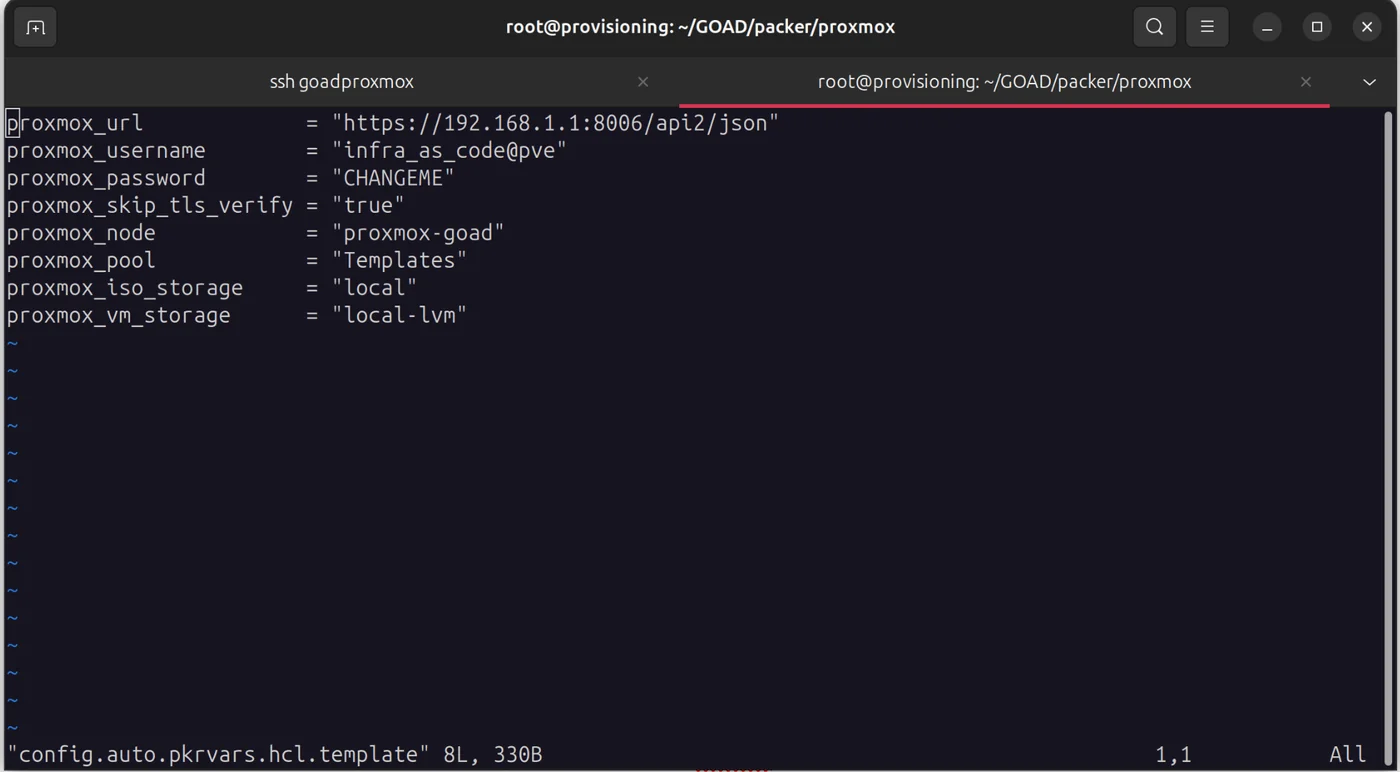
config.auto.pkrvars.hcl:
vim config.auto.pkvars.hcl
proxmox_url = "<https://192.168.1.1:8006/api2/json>"
proxmox_username = "infra_as_code@pve"
proxmox_password = "infra_as_code@pve_password"
proxmox_skip_tls_verify = "true"
proxmox_node = "toad"
proxmox_pool = "Templates"
proxmox_iso_storage = "local"
proxmox_vm_storage = "local-lvm"
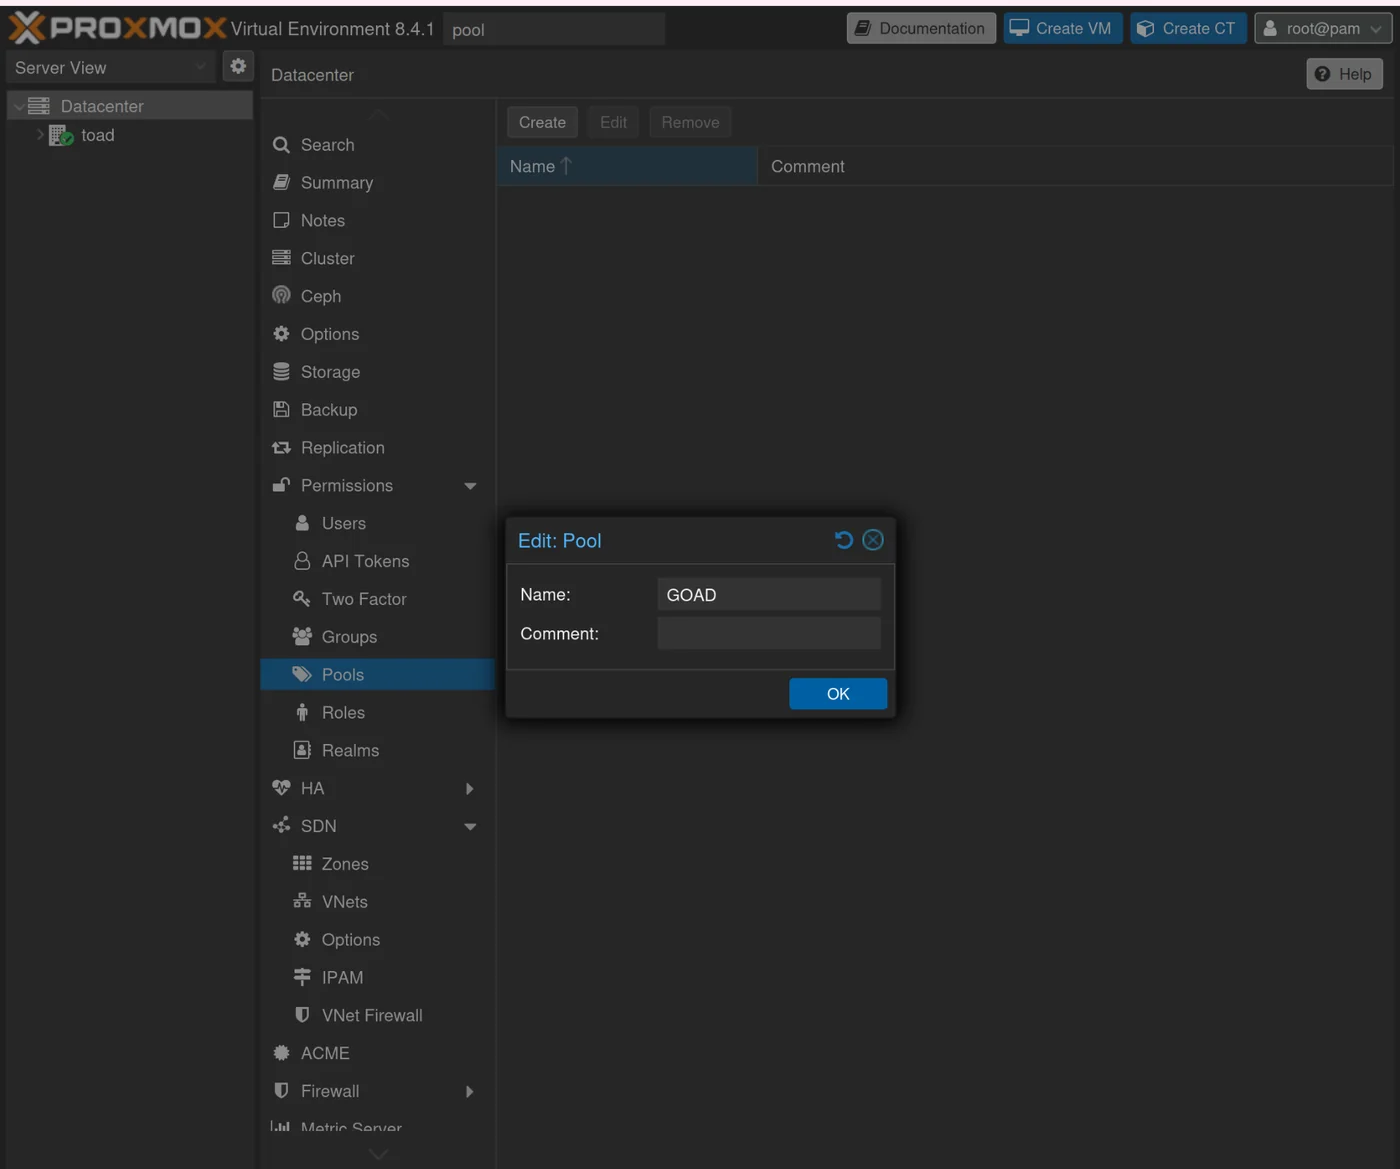
If you don't have a proxmox_pool: Check available proxmox_pools with zpool list
Create a pool if none is available:
Datacenter → Permission → Pools → Create
If you don't have local-lvm for proxmox_vm_storage: I set both proxmox_iso_storage and proxmox_vm_storage to "local" to avoid creating another storage
Run build_proxmox_iso.sh: this creates ./iso/Autounattend_winserver2016_cloudinit.iso
cd /root/GOAD/packer/proxmox/
./build_proxmox_iso.sh
Copy scripts_withcloudinit.iso from goadprovisioning to goadproxmox
scp ./iso/scripts_withcloudinit.iso root@192.168.1.1:/var/lib/vz/template/iso/
curl -fsSL https://apt.releases.hashicorp.com/gpg | sudo gpg --dearmor -o /usr/share/keyrings/hashicorp-archive-keyring.gpg
echo "deb [signed-by=/usr/share/keyrings/hashicorp-archive-keyring.gpg] $(lsb_release -cs) main" | sudo tee /etc/apt/sources.list.d/hashicorp.list > /dev/null
apt update && apt install packer && apt install terraform
Build with packer
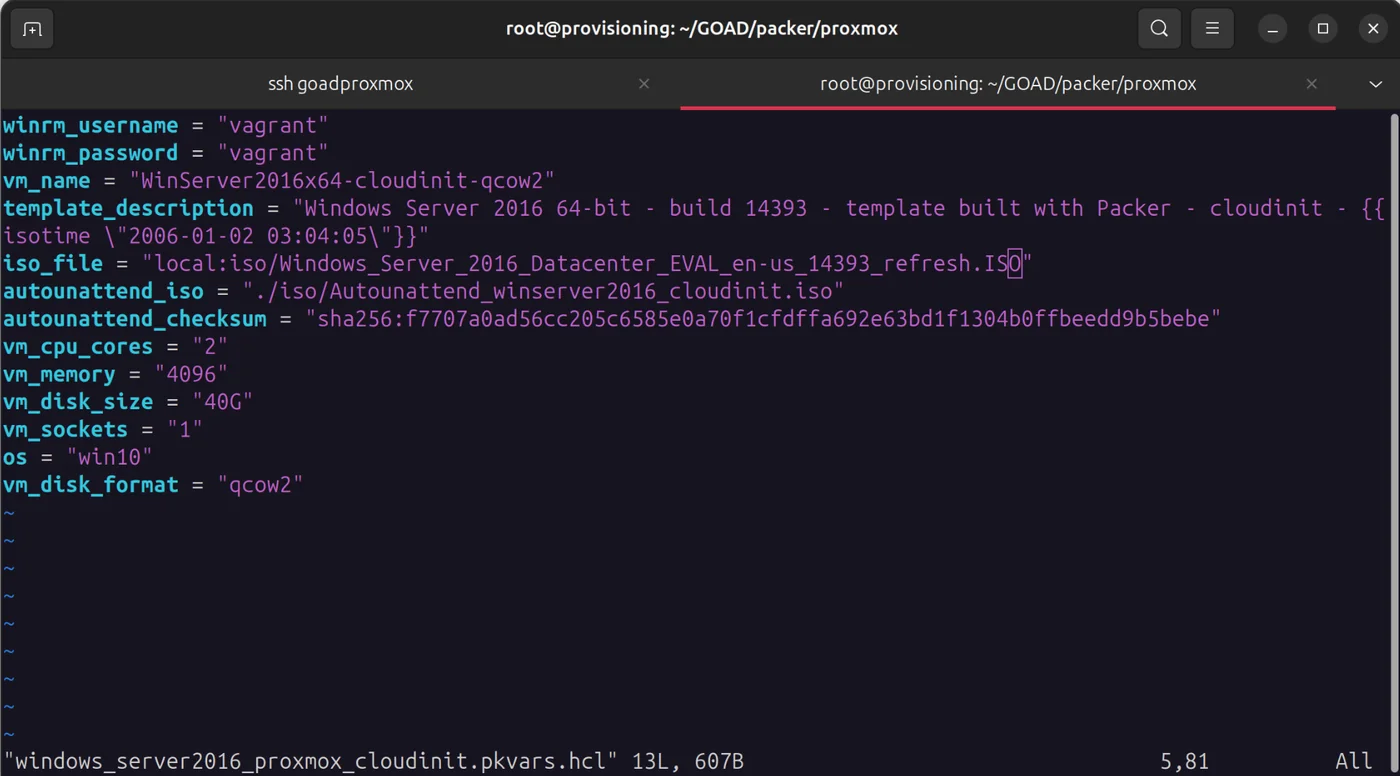
The values in windows_server2019_proxmox_cloudinit.pkvars.hcl and windows_server2016_proxmox_cloudinit.pkvars.hcl should be correct since we named the windows iso files correctly:
cd /root/GOAD/packer/proxmox
packer init .
packer validate -var-file=windows_server2019_proxmox_cloudinit.pkvars.hcl
packer build -var-file=windows_server2019_proxmox_cloudinit.pkvars.hcl .
Do the same for server 2016
packer validate -var-file=windows_server2016_proxmox_cloudinit.pkvars.hcl .
packer build -var-file=windows_server2016_proxmox_cloudinit.pkvars.hcl .

Provisioning
The important variables are in /root/GOAD/globalsettings.ini and /root/.goad/goad.ini
If you have made other changes to ips, proxmox_pool, proxmox_node, storage, etc. modify them here.
You don't need to modify the default values in goad.ini since we will pass the variables directly in the command. However, modify the values under [proxmox] if you have a different name for the pool or node.
Run, this may take some time
cd /root/GOAD
./goad.sh -t check -l GOAD -p proxmox -ip 192.168.10
./goad.sh -t install -l GOAD -p proxmox -ip 192.168.10
Enter your password for both prompts for the infra_as_code@pve user you created earlier

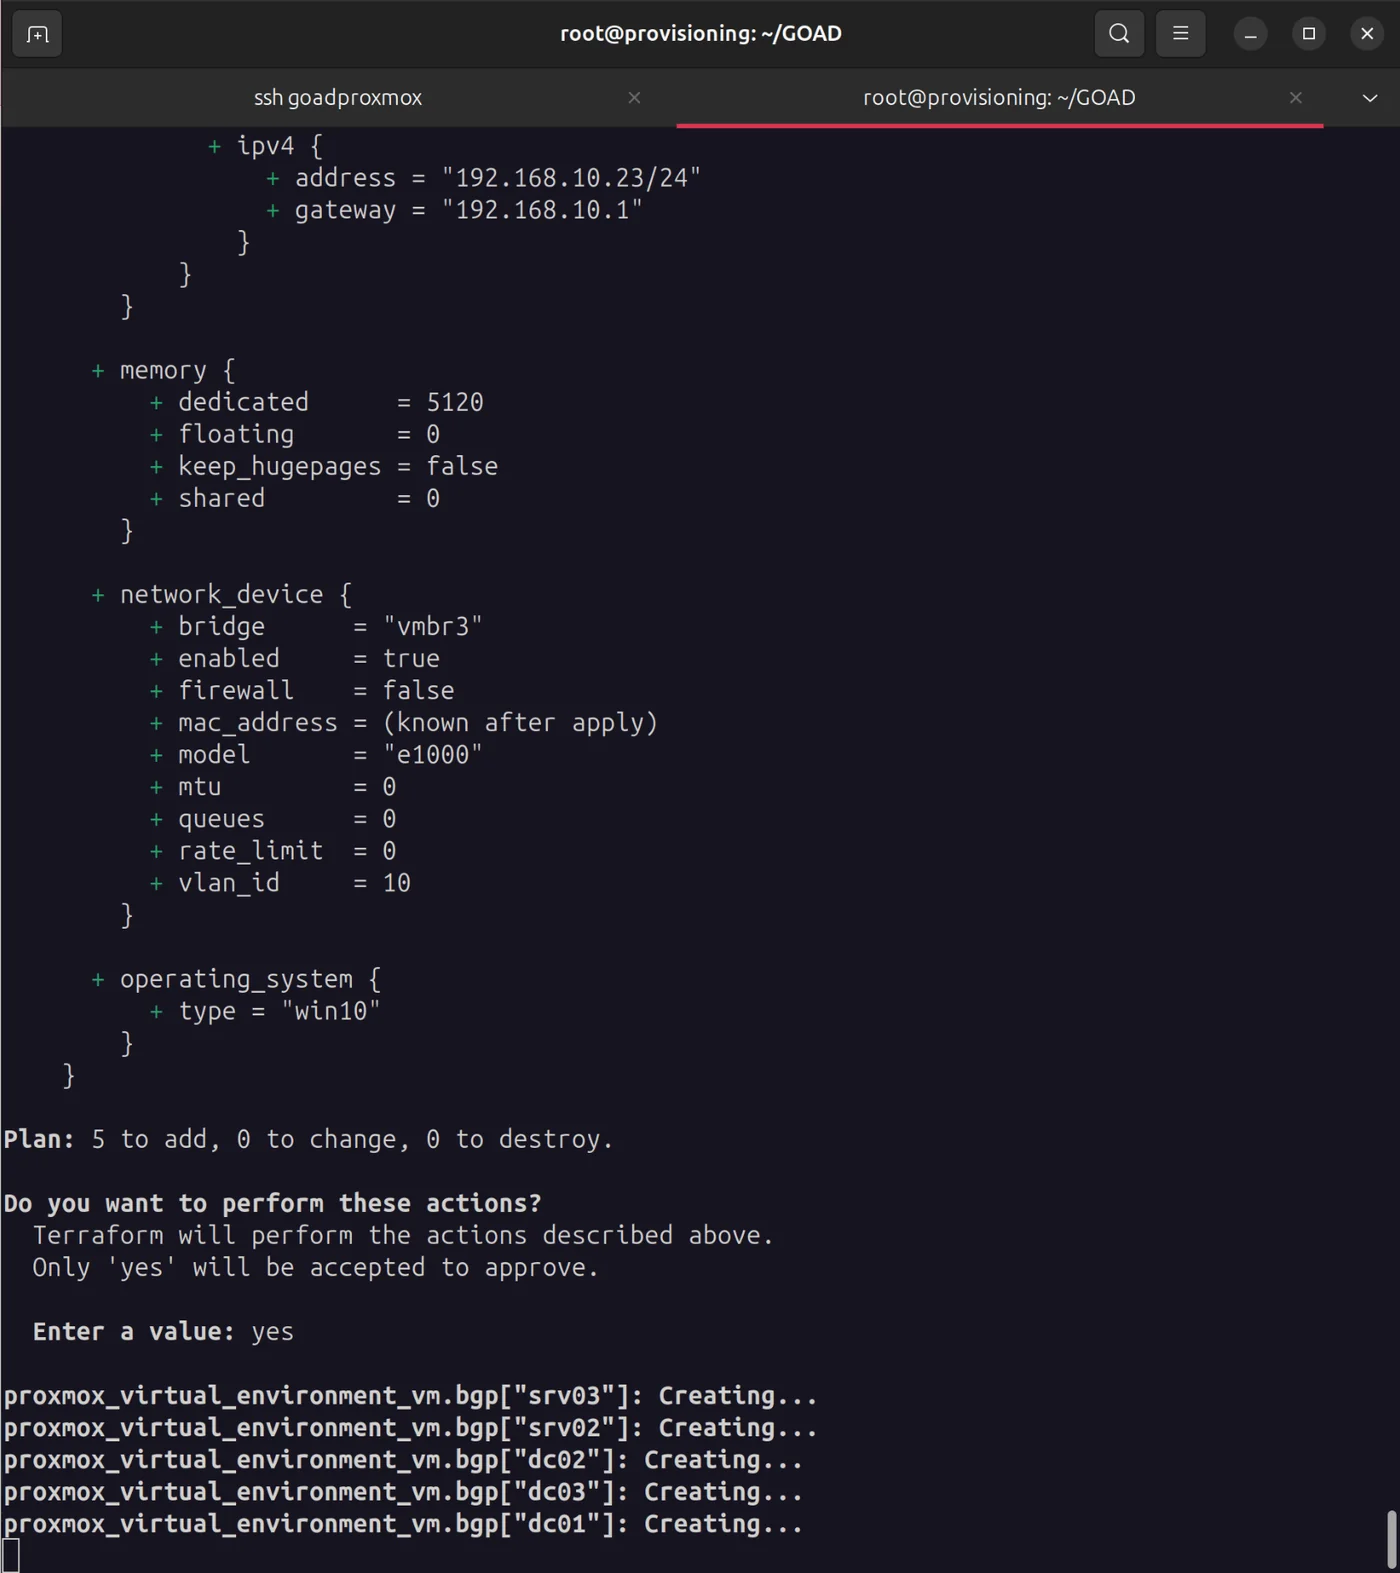
It took me about an hour, but all five virtual machines were created!
For the rest of the lab installation, we will configure the VPN to access the network, and install a Trapster VM: Part 3 - OpenVPN + Trapster
Troubleshooting
If you encounter problems, check the Internet connection as well as the DNS resolution of the machines. The most common errors come from the fact that the created virtual machines have no DNS resolution or Internet access. You can check this with commands like dig or route, or by using Proxmox diagnostic tools.